
Review - The new Haida M10 Filter System
Author: Samuel Scicluna
At some stage, all landscape photographers will look to invest in a filter system to help them take their photography to the next level.
Filters enable you to have better control of the light entering your camera, this can also help you to be more creative by shooting longer exposures, but it can also help ensure you get the shot right in camera, especially in high contrast scenes.
You can read more about using filters for landscape photography Here.
My history with different Filter systems
My first slide in filter system was quick and easy to set up and change the filters, but unfortunately the resin filters included in the kit had a severe purple color cast. Before my first trip to Iceland, I decided to invest in better quality filters, to ensure that I got the best quality photos on what I then thought would be the trip of a lifetime (Little did I know that I would travel back to Iceland again twice more in the following 18 months).
It took me a while to decide to spend money on professional quality glass filters, but the way I reasoned it was that it made no senses to put a cheap piece of resin infront of a 1200 Euro lens as this would clearly be detrimental to image quality. Resin filters in general tend to get scratched very easily, which means you have to be extra careful when using them. I finally settled for 100mm Haida glass filters. I bought 6 filters in total, these were a 2 and a 3 stop Grad ND; 3, 6 and 10 stop NDs and a 105mm Circular Polariser. I was really impressed with the quality of the filters, they arrived in sturdy metal tins and had absolutely no visible color cast.
In Iceland, my filters had their fair share of abuse, from being drenched in salt water, to being blasted by sand storms and even being dropped into the sand a couple of times. Throughout all this though, they remained immaculate, they never got scratched and they were really easy to clean.
The most impressive feature to me was the quality of the glass. There was no loss in detail or sharpness as I had seen with other filters and the colors were spot on. In 2018 I started using the Haida 100-Pro holder as this had some significant advantages over my first filter holder, mostly because it was much smaller and lighter. The whole system, including 3 adapter rings was half the weight of my previous system! It might not seem like a lot, but when you are hiking in the mountains, every little counts! The 100-Pro was pretty much superior in every way, apart from usability, it was much more fiddly to use and took more time to setup.
The Haida M10 Filter Holder
I have to start by saying I believe Haida really does listen to customer feedback and implement this when designing their new products, as the M10 holder maintains all the fantastic strong points of the 100-Pro, including an embedded Circular polariser, but removed all the annoying little gremlins it had, making the M10 an absolute joy to use in the field.
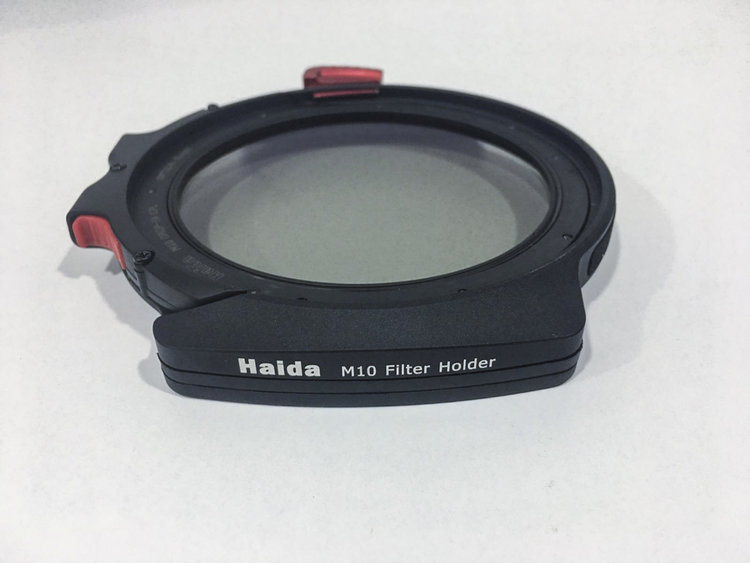
The new Haida M10 Filter Holder.
What’s in the box?
A new dual zipped protective pouch
M10 Filter holder
Adaptor ring
Drop in Circular Polariser
Drop in Light Barrier
2 additional plastic guides to allow the M10 to take 3 slide in filters on the front
A set of longer screws so that you can attach the 2 additional plastic guides
Mini screwdriver
The M10 is available with all sizes of adaptor rings from 37mm up to 82mm.
For bigger diameter lenses and Ultra Wide angles like the Nikon 14-24 F2.8, Haida have a separate new holder called the M15.
Haida have designed the M10 from the ground up, including a brand new molded case which is a huge improvement on the older soft case of the Pro-100. The new clam like case has 2 zippers and is hard on the outside, to protect the M10. It is lined with a soft velvet to ensure that the filters do not get scratched. The case also has a little carabiner which can be used to attach it to a tripod or belt.

The new Haida M10 Pouch

The M10 holder is cushioned by soft velvet all around, ensuring it is protected.
Newly designed Drop in Filters
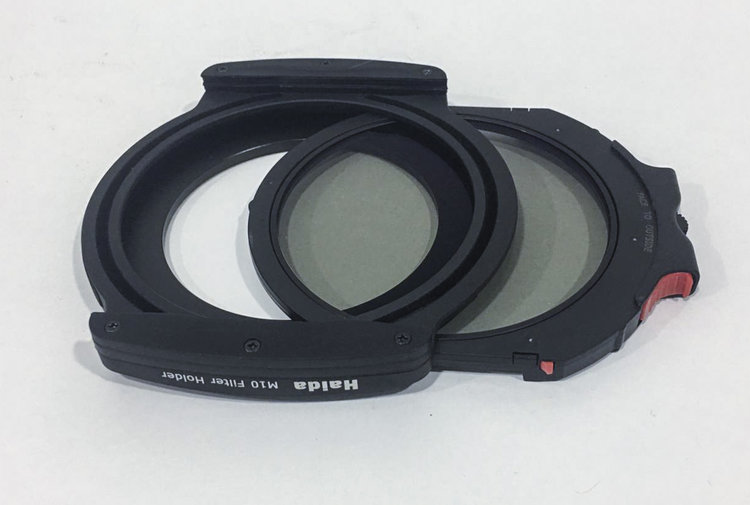
Once your adapter is on the lens (I always leave my adapters on the lens as it saves me time when out on location), it just takes a second to clip the M10 into place thanks to the brand new spring loaded clip. The most impressive feature of the M10 is the new ‘Drop in slot’ which can be used to hold a one of Haida’s new drop in filters, which include the following filters:
3 stop Neutral Density
6 stop Neutral Density
10 stop Neutral Density
15 stop Neutral Density
Circular Polarise (Included in kit)
Clear-night (Light pollution filter)
3 Stop GND
4 Stop GND
3 Stop ND+CPL
6 Stop ND+CPL
When my M10 kit arrived, it included the drop in CPL, but also a 10 Stop ND filter and a light barrier, which is used to avoid light leaks if you were just using slide in filters on the front of the holder.
This new concept has made the M10 an absolute pleasure to work with and use, especially when out in the field and needing to work quickly!
Using the M10
The biggest improvemet on the previous 100-Pro is the new quick release ssystem. The red tab on the side is spring loaded, and quickly allows you to set up and remove the holder.
Changing filters on the M10 is also much quicker using the drop in system. It only takes a couple of seconds to pull out one filter and drop in another.
The M10 does away with the issues the 100-Pro had when it came to working quickly and in awkward positions.
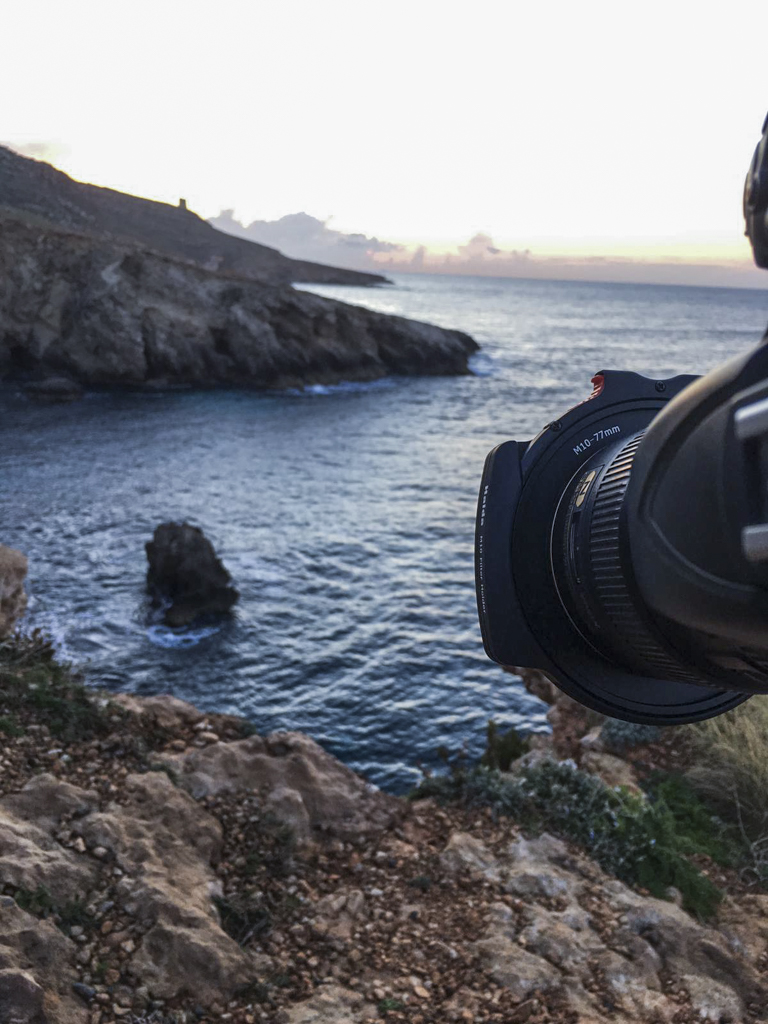
I did some vignette tests with my Nikon D810 and 16-35mm to check for vignetting. To really put the system to the test, I attached the additional filter guides, which protrude further and on previous filter systems have always been slightly visible in the frame. I’m pleased to say there is absolutely no vignette (Apart from the normal vignette of the Nikon 16-35mm Lens, which can be removed with profile corrections in Lightroom).
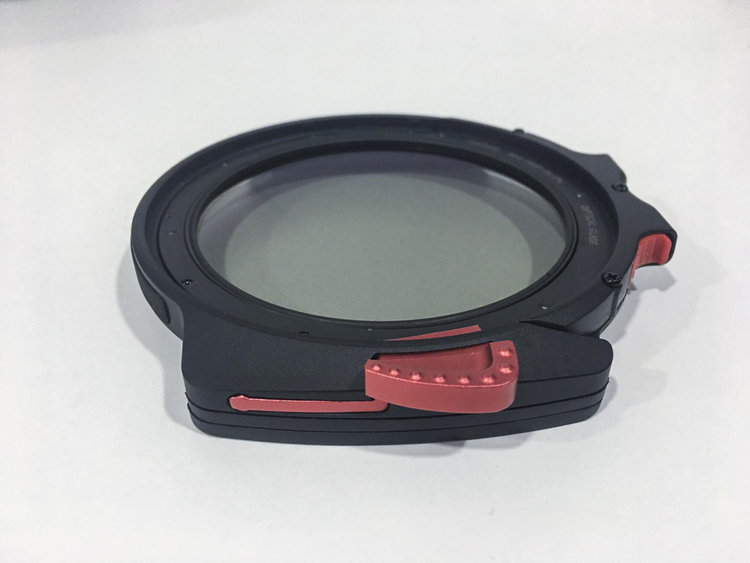
The red spring loaded tab makes it much easier to mount and dismount the M10.
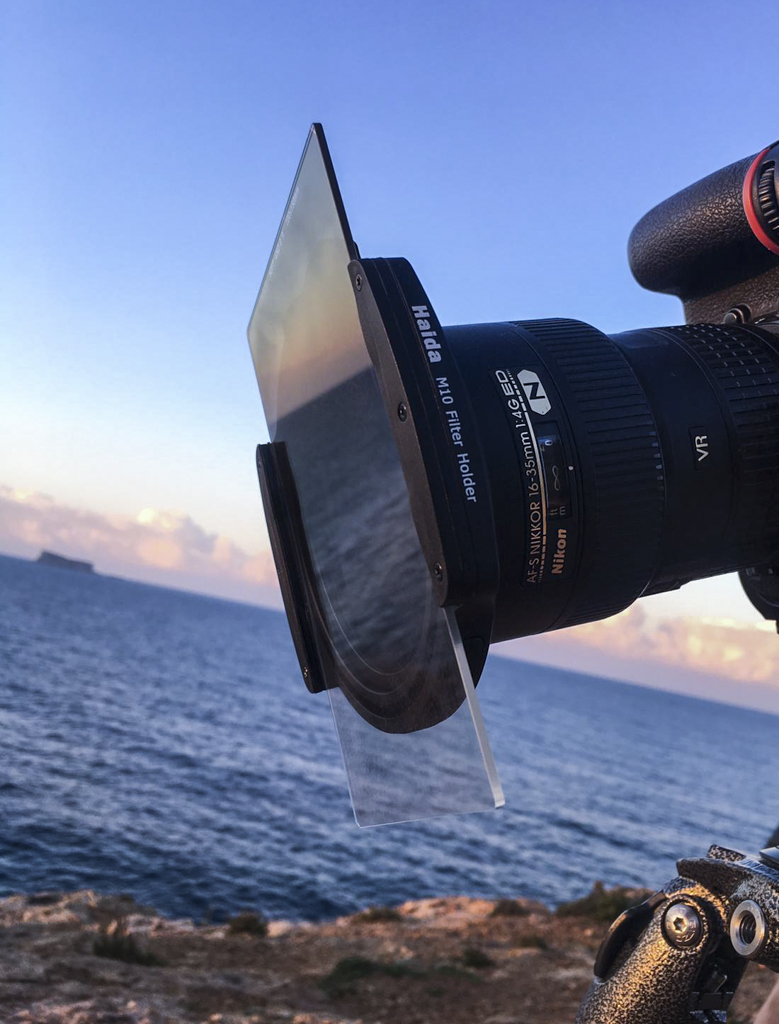
The M10 mounted on my Nikon 16-35 Lens. I was shooting with the new drop in 10 Stop filter and a 3 stop ND Soft Grad to darker the sky.
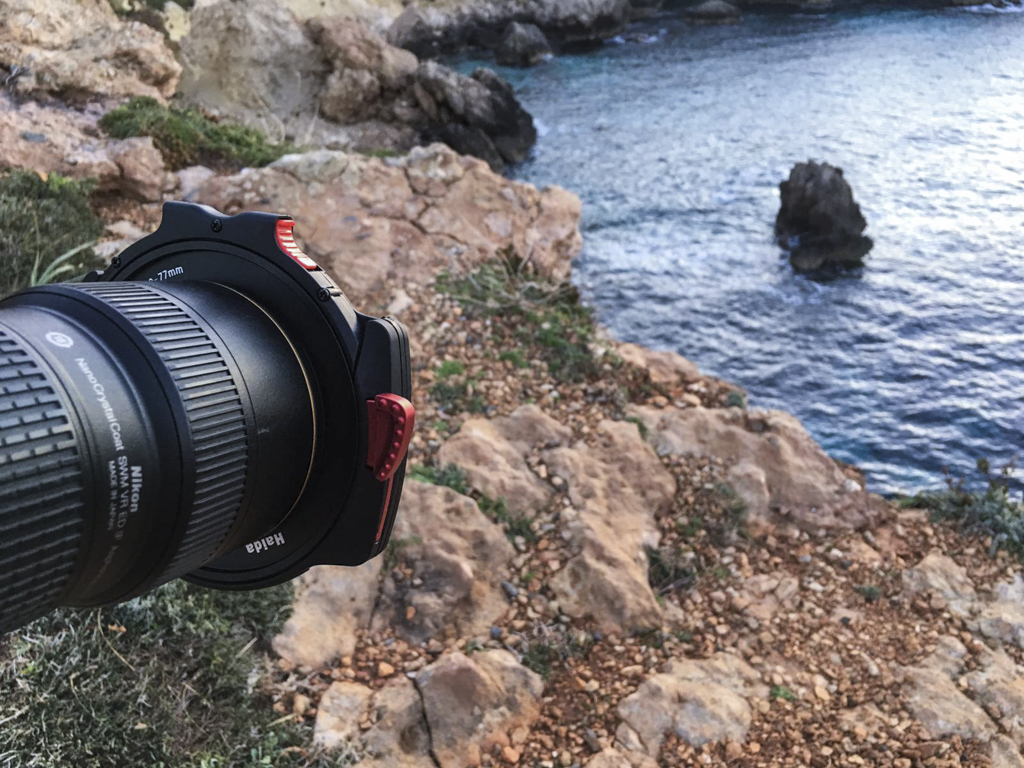
The M10 mounted to my Nikon 16-35mm lens. Notice the large red tab (RIght) used to mount and dismount the M10 from the adaptor ring.
Verdict
If you are in the market for a new lens system, is the M10 worth it? The simple answer is, without a shadow of a doubt, Yes! The M10 is a professional quality product, it has been thoughtfully designed and makes the 100-Pro feel like a dinosaur!
I have already had several occasions where the M10 has saved precious seconds changing filters as the light changed. The new drop in filters are a great addition and give you more flexibility to use multiple filters.
The M10 has hit the nail on the head and does everything a filter holder should do. So far, I can’t think of any ways that it can be improved, it has never missed a beat and has helped me ensure I am not wasting time at the critical moment when the light is amazing!
You can see Haida’s full range of filters and holders on their website: www.haidaphoto.com
I will write another review once I have used the M10 for a couple more months.
Please Note: This is not a paid review or product endorsement. I have used and tested the Haida M10 Filter system and the above review is my opinion about it.
The link of the review:
https://www.samuelscicluna.com/m10-review/
Related news
- Review - The new Haida M10 Filter System
- Tips of Choosing Suitable Filters
- M15 Filter Holder Haida
- Product Review: Haida Filters
- Haida Filters in Depth Review
- First Experience with Insert Filter