
New Red Diamond Series Part 1
--clear night filter and more
Offer: Kai Hornung
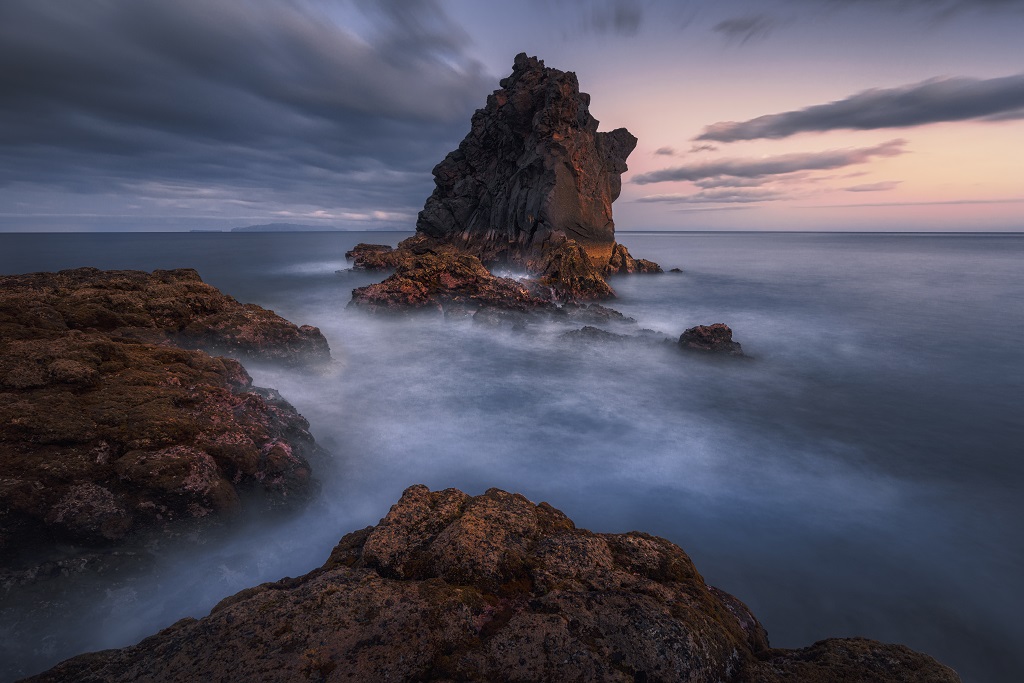
Santa Cruz, Madeira - long exposure of 30 seconds made possible by using a 10 stop ND filter (NanoPro ND 3.0 100x100mm Filter)
Photo editing software keeps improving and I gladly use it to my advantage in post processing my images. One thing remains unchanged though: you cannot have a great image if you don’t get it right in camera. In order to achieve the best results in camera I - of course - use filters when appropriate. In fact filters are essential equipment for any landscape photographer.
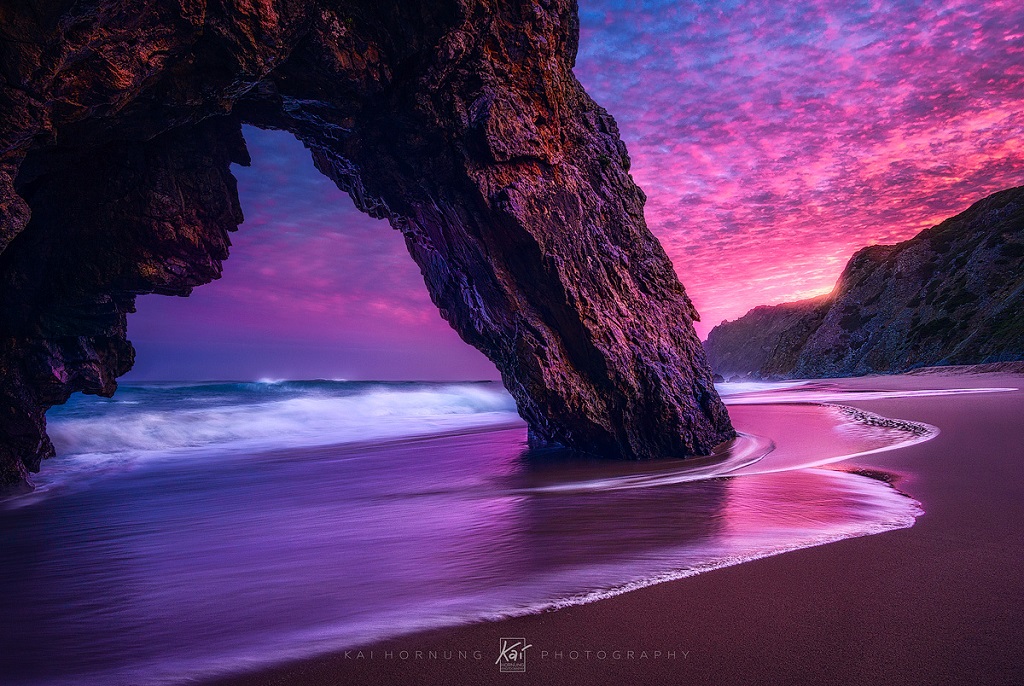
Sunrise at Praia da Adraga, Portugal. One of my personal favorites. Photographed using a circular ND 1.8 from Haida on my Sony a6000.
When I started out with landscape photography I got myself a ND (neutral density) filter to be able to have slower shutter speeds. I wanted to be creative and widen the experience of using my camera for more than its usual modes it had to offer. Little did I know about how to work filters. But I knew how to google and I knew my budget. So I ended up getting a circular ND 3.0 called Pro MC II from Haida. It was well within my budget and it never failed on me. On many occasions I used that filter, especially when being at the sea shooting seascapes. I got myself a couple of other filters to screw on various lenses to react to the different amounts of light outside (bright day light, overcast skies, fading daylight in blue hour etc.). And I stuck with Haida. They were in my budget and the results always looked fine to me.
Never would I have thought I would eventually become an official Haida brand ambassador years later and get a chance to test different filters from them. But now that I have I would like to tell you my experiences and why I recommend Haida filters for any photographer, no matter if being a creative hobby photographer or demanding professional.
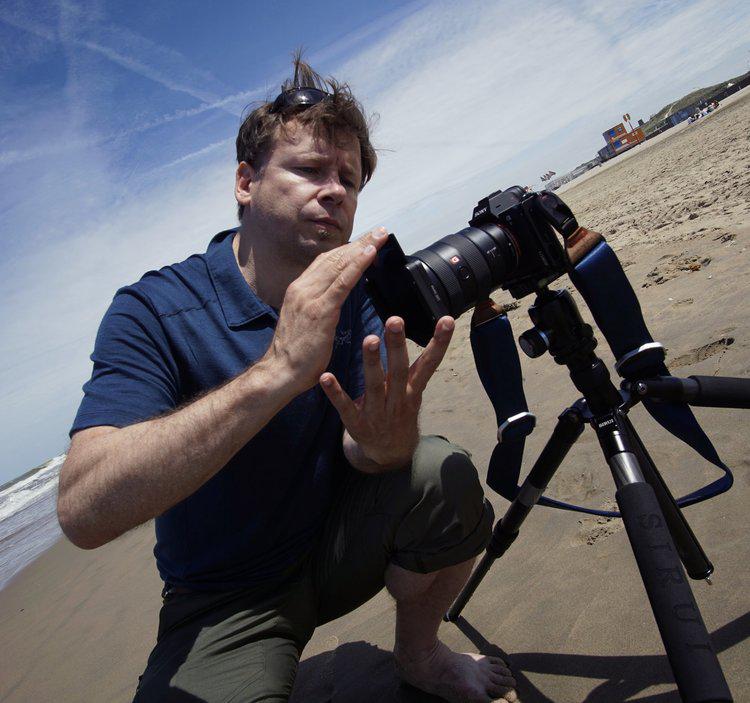
Working with Haida filters at the beach of Scheveningen, Netherlands
I would like to give a little instruction on how to read my review though: because I won’t get into physical details or specifications on filters here. You can find plenty of this with ease when throwing on google. I am not a technical oriented photographer. I want my gear to function and work and most of all enable me to be creative without having to care about my gear. It is from that standpoint that I write this article.
So to start things out I would like to make something clear, especially for people who are not familiar with the use of filters: sometimes I receive questions of people asking if I had used a filter in an image, actually wanting to know if the overall look of a fully processed image could be achieved by just using a filter. So I guess, it is worth stating: filters I refer to in this article are physical devices you use to reduce the amount of light that hits the sensor of your camera. There are software filters of course, which are actually presets (like on Instagram) that you can use for editing your images. When people refer to #nofilter they actually mean they have not altered the image file with post processing. It might be a bit confusing at first. So no: filters (the physical ones on your lens) are not the push on a button that turn your images into greatness and fame. But they are helpers in being creative and just necessary for certain effects.
Circular filters or square filters?
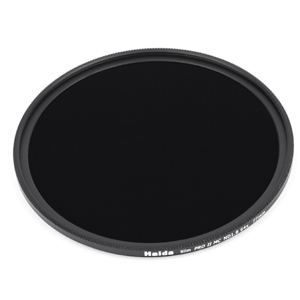
Official product image of Haida Slim PROII Multi-coating ND1.8, 64x Filters
Let us get this straight: there is no wrong or right. When I used to place my small tripod with my small Sony a6000 next to other photographers with their huge DSLRs I sometimes felt intimated especially when I screwed on my little circular filters and stood next to their impressive gear and huge square filter systems. Imagine sitting in a small car on a parking lot where Hummers, Porsches and SUVs turn in and park right next to you. You get the impression. Well anyways, this did not stop me from taking images like the sunrise at Praia da Adraga which you can see above (and which will be displayed as a large print at Photokina 2018 at the Haida stand, for example).
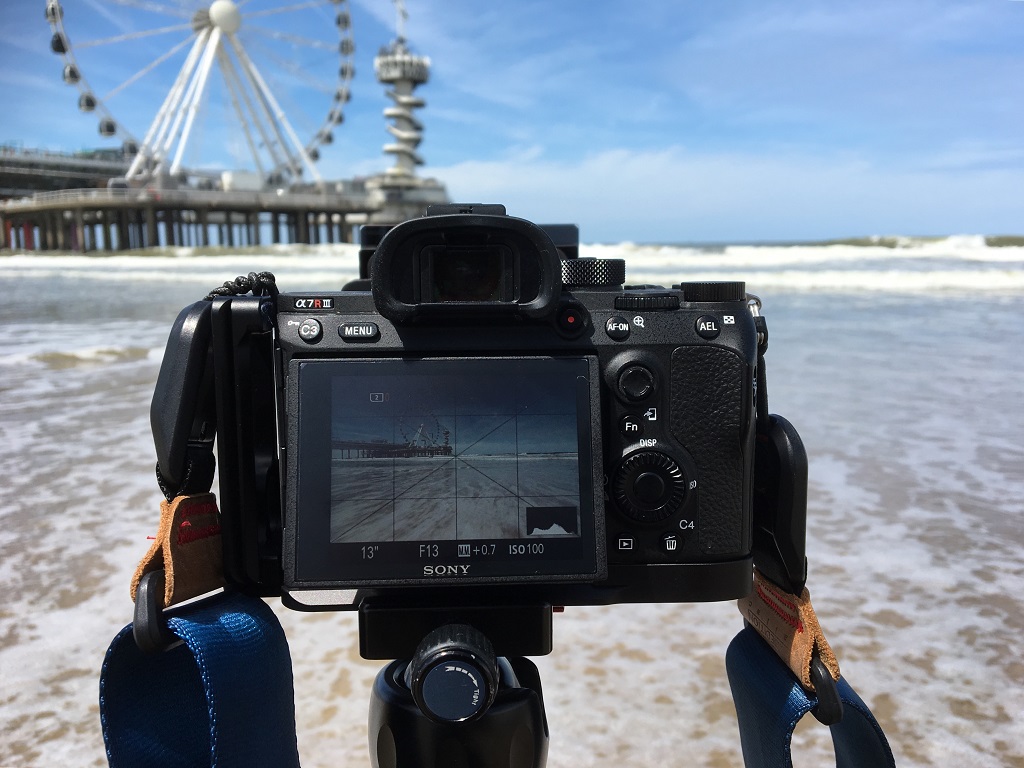
The Haida 100x100 filter system on my Sony a7riii at the beach of Scheveningen, Netherlands, as I was photographing long exposures
I always wanted to test those square filter systems and see if this is 'real photography'. And when Haida provided me with a filter system, I could finally see what was on the 'other side' of using filters. In fact, Haida was so kind to provide me with a 100 Pro Insert Filter Holder, adapter rings, the NanoPro MC CPL (Circular Polariser) and various filters such as NanoPro Soft ND 0.9 100x150mm Graduated Filter, NanoPro ND 3.0 100x100mm Filter and NanoPro ND 0.9 100x100mm Filter.
So to get this out of the way: yes, there are advantages of using a filter system with square filters over using the circular screw on filters. But there a cons also. Those circular filters really shine when you want to have less gear to carry with you and yes it is mostly cheaper. Especially when you settle for just a polarizer and let's say 2 ND filters and a couple of step-up rings (to be able to use the filters on different lenses with different diameters).
In short:
The advantages of square filters over circular filters:
1. easy to recompose and focus (you just flip the filters off and set the camera up without filter; reason: a ND 3.0 will darken the image that much, that you will not see anything in your live view. And nobody wants 5 minutes or so test shots)
2. only way to use graduated neutral density filters
3. easier to stack several filters
4. once the filter holder is placed it is fast to switch filters
5. it seems like filter manufacturers prefer producing high class filters for square filters first before doing so for the circular ones
The advantages of circular filters over square filters
1. cheaper (remember to use step up rings)
2. less gear to carry around; this also means you can have those small filter cases in your jacket and change at the sight. The square system rather requires some sort of extra small bag.
So what system is my preferred one? Well, I have settled for the square filter system. The main reason being that I have a collection of various filters now and they enable me to use filters in all sorts of conditions to support my photography. I am a rather ‘take-more-with-me than-I-might-need’ person. I hate the thought of not being able to take an image the way I want it to, because I left the lens or filter at home. This means a heavier backpack for me more often than not. …something I don’t always cherish on hikes. But oh well, everything comes with a price.
Haida ND filters (vignetting and color cast)
I will keep the fundamentals on what a natural density (ND) filter does short: it reduces the amount of light that hits the sensor of the camera and therefore makes you have to increase the shutter speed. For example If you want to photograph silk waterfalls, smooth lakes and oceans or have those ‘flying’ clouds you need to have longer shutter speeds. The ND filter makes sure you will not overexpose your image by reducing the amount of light that comes through to your lens. If you are new to the subject I recommend reading through some of the countless articles in the web or watch some of the beginner tutorials on YouTube. And then try, try, try. You will see it is great fun and in the end not difficult to do.
On this image you can see the effect a ND filter has on all moving elements: here being the water of the lake in the foreground, the clouds on the mountain peaks and even the light hitting the landscape. It all gets smoothed out by an almost 9 minute long exposure. For this very long exposure I stacked 2 ND filters into my filter holder: the NanoPro ND 3.0 100x100mm and the new Red Diamond ND 1.8 100x100mm both from Haida (this image is a pre-edited raw-file inside Lightroom).
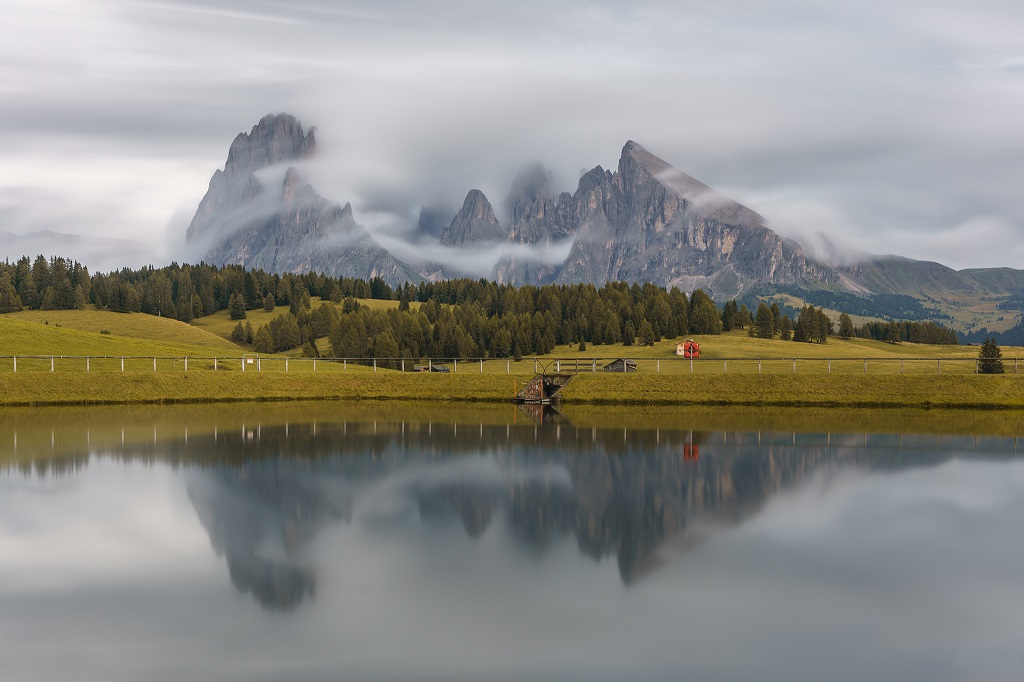
with Haida ND Filter (35mm, f10, 526 sec., ISO100)
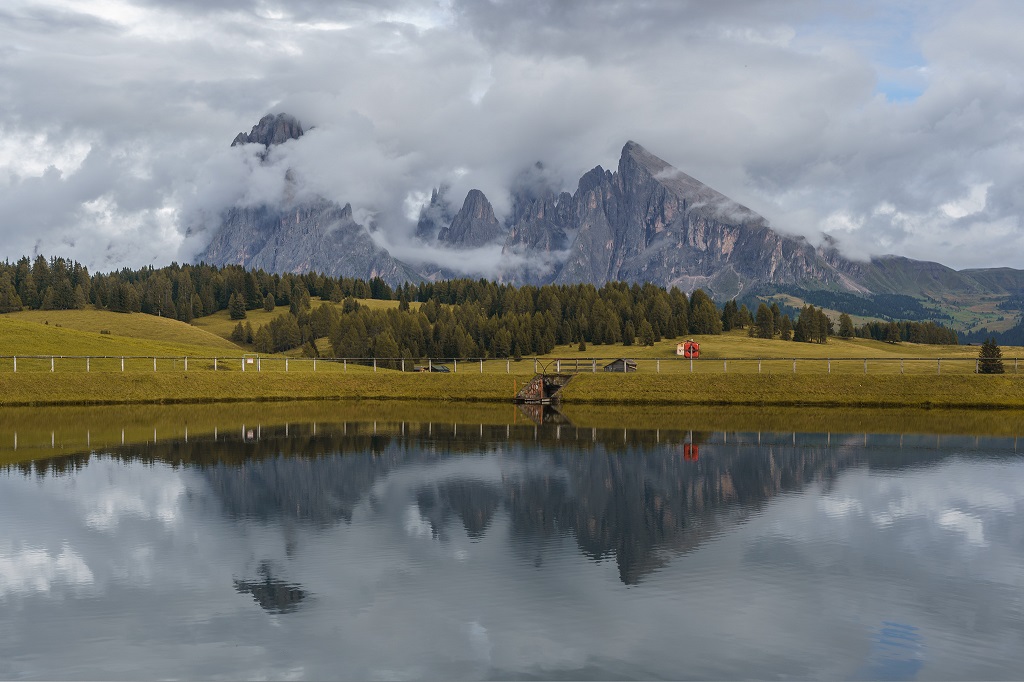
without Haida ND Filter (35mm, f10, 1/60 sec., ISO100)
Stacking filters to reduce the light by a combined 16 stops is a drastic move I rarely ever do. In this case I noticed the moving clouds in the peaks and I tried to achieve this ‘milky’ effect. It gives the image an artistic look that I really like in this case.
As you can see the used filters don’t steal away any details of the image. There is no visible vignetting (the image is cropped a tiny bit to strengthen the composition and not as wide as I could go with my lens; which would be 16mm in this case). But there could be some resulting vignetting when shooting wide open with 16mm or wider (at least on my 100x100mm filter system) that is why I usually zoom into 18mm to start with when using my filters.
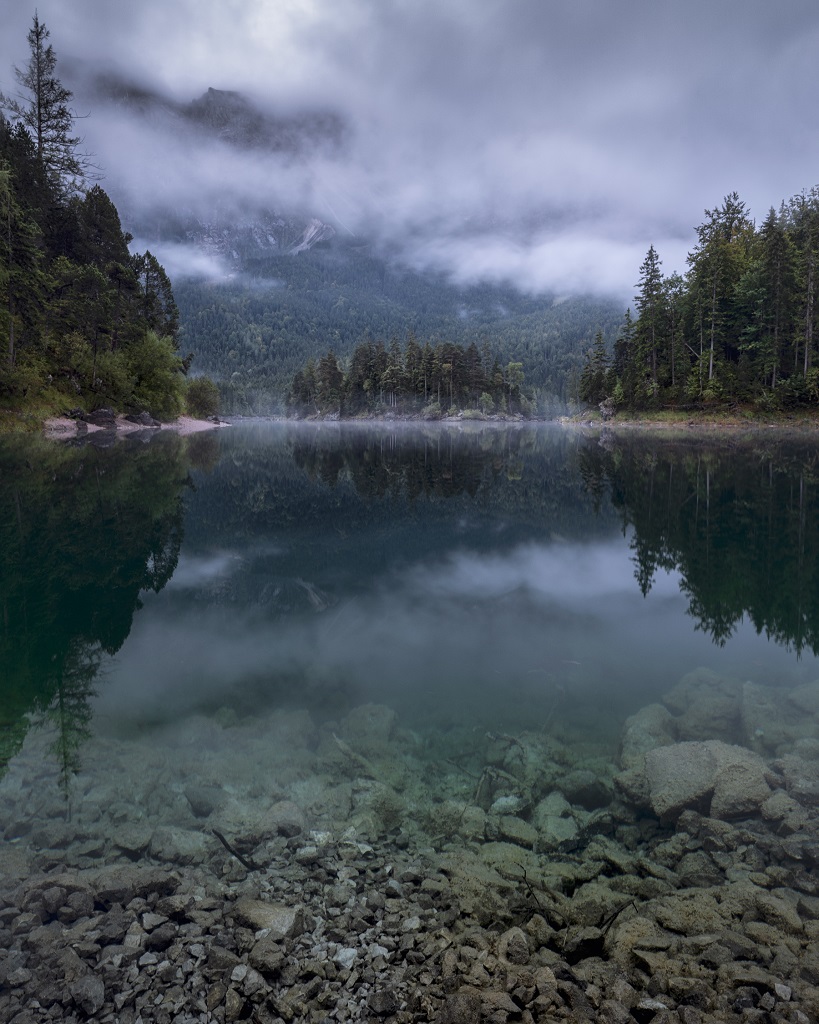
early morning at Eibsee, Germany. The NanoPro MC CPL (Circular Polariser) was used to help see through the clear water of the beautiful lake. The tripod was placed into the water of the lake. The pol filter did a good job revealing a clear view through the water.
One thing everybody always asks about is color casts with filters. I heard that some filters from other brands have very strong color casts which are rather annoying to correct in post production. I find that the Haida filters I tested have very little to no color cast at all. Look at the before and after comparison. Yes, the filtered image has a slightly warmer tone. This is from the filter but even more so from the light of the sun that sneaked through the clouds from time to time within those 8 minutes and that provided a more even light on the landscape (an effect that is a bit underrated when using ND filters, but is actually very helpful in smoothly lighting up scenes).
To be continued....
Related news
- New red diamond series, clear night filter and more-Part 1
- Tips of Choosing Suitable Filters
- M15 Filter Holder Haida
- Product Review: Haida Filters
- Haida Filters in Depth Review
- First Experience with Insert Filter