
Using a Graduated ND Filter to Balance the Sky
Offer: Thomas Kast
Doing landscape photography I'm using very often filters in front of my lenses. Using them can result in many advantages:
- they are great tools to create your visions
- they help to preserve all or at least most of the details of the scene and so ensure you have high quality raw files
- they can and will save a lot of time (and pain) in post processing
- filters are great tools to make your photos unique
There are three main types of filters I'm using: polarizers, ND filters and graduated ND filters. All of them have different purposes and today I concentrate on one of the graduated ND filters from Haida's Red-Diamond series.
A ND filter is a piece of glass/resin which is darker than normal glass. It's a bit like sunglasses which help your eyes to deal with a too bright sky. The ND filter acts similar and has a certain darkness throughout the glass. A graduated ND filter is a bit different. Let's have a look at the filter I used here, the Haida Red-Diamond Soft Grad ND0.9 Filter,100*150mm:
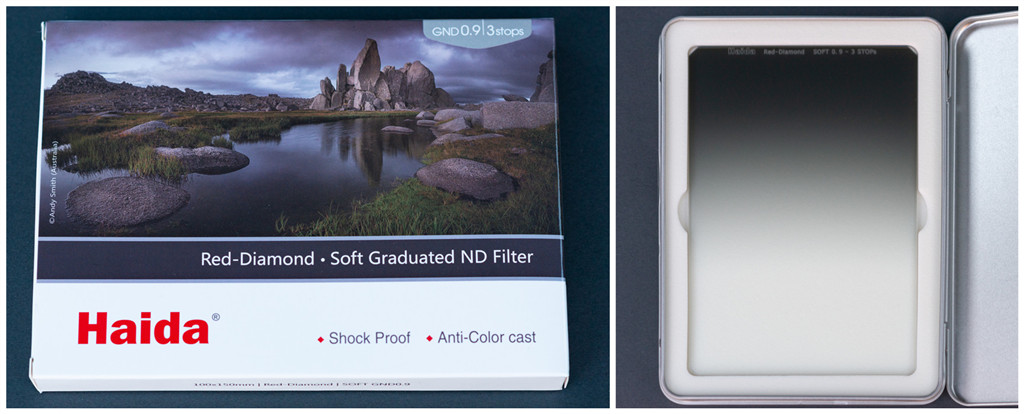
You can see that half of the filter is just like normal glass and half is darker. Looking closer at it you can see that the darker half is gradually getting more dark from center towards the edge. That's why it is called a 'graduated' ND filter.
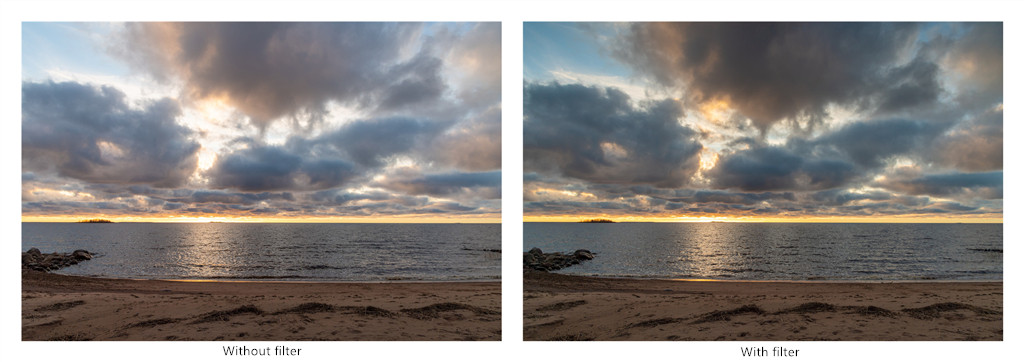
Putting that 'line' where the filter starts to darken on a horizon can help to balance the bright daylight in the sky. Let's have a look at one example. First you can compare both raw versions, meaning the raw photos out of the camera.
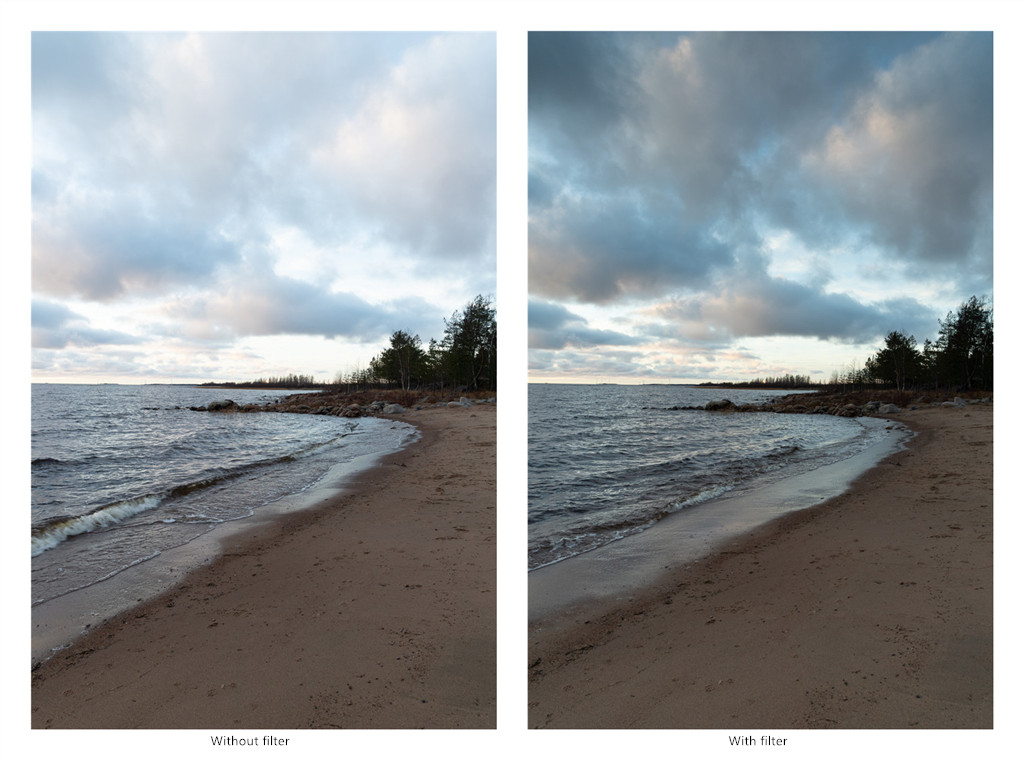
Can you see the difference in the sky and clouds? For me, the photo without filter doesn't work well for several reasons. It is hard to see any details in the clouds, I really need to look hard to see texture. Also, my eyes want to constantly look into the sky where it is bright. I almost 'have to force' my eyes to look even down at the beach and the waves. Of course, that is just me.
I did edit both versions similarly and here you can see and compare the finished versions:
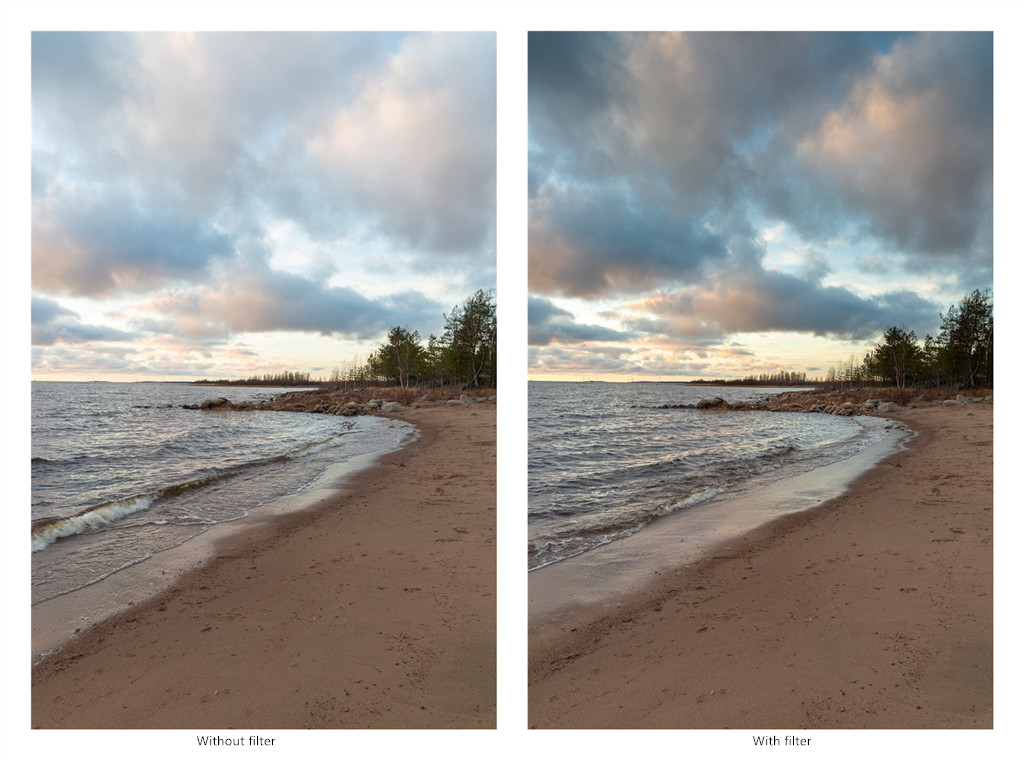
Here are my thoughts: The 'Without' version has still a bit too bright sky. With post processing it is possible to further darken the upper part of the sky. But we run into problems because the sky has been just too bright and cannot be edited well anymore. Often, when this is being attempted it will be visible near the horizon that the original file was just too bright. Using a graduated ND filter keeps me away from that challenge (even though it is possible to recover all details at times).
Which brings me to the 'With' version. The sky has more drama, structure, texture, details - whatever word you like. If you look at the horizon the sky is party yellow and blue. Also the colors in the clouds are more visible just because they are captured with a not too bright exposure.
What is not to dismiss is the possibility to use HDR technology, taking a bright & dark photo and combine them accordingly. Nothing wrong with that. Using the filters just allows you to produce one photo of the scene with the possibility of relatively little editing work.
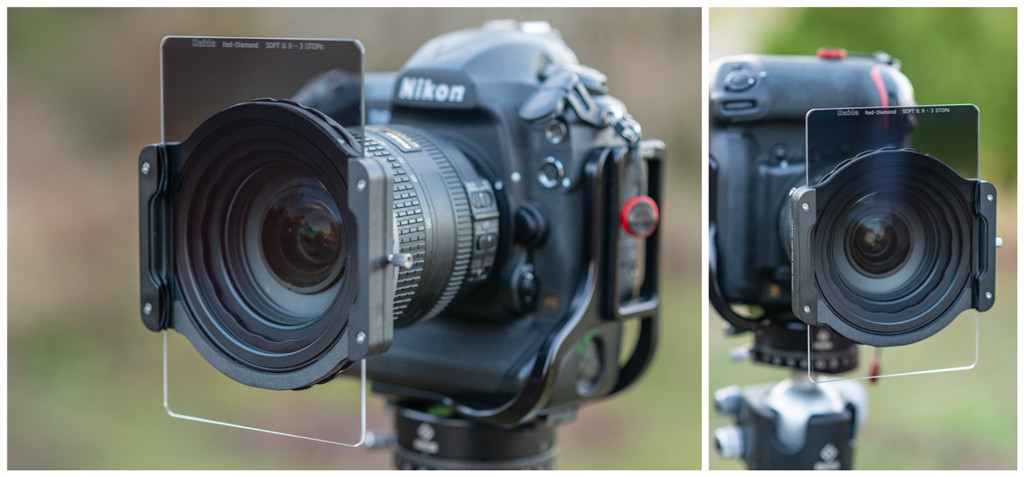
Here is the setup I used for these photos:
Camera: Nikon D5
Lens: Nikon 24-120mm f4
Filter holder: Haida 100-PRO Insert Filter Holder
Filter adapter: Haida 100-PRO Adapter Ring,77mm (to fit the holder onto the lens)
Filter: Haida Red-Diamond Soft Grad ND0.9 Filter,100*150mm
Exposure time: 1/25s
Aperture: f/9
Focal length: 24mm
ISO: 100
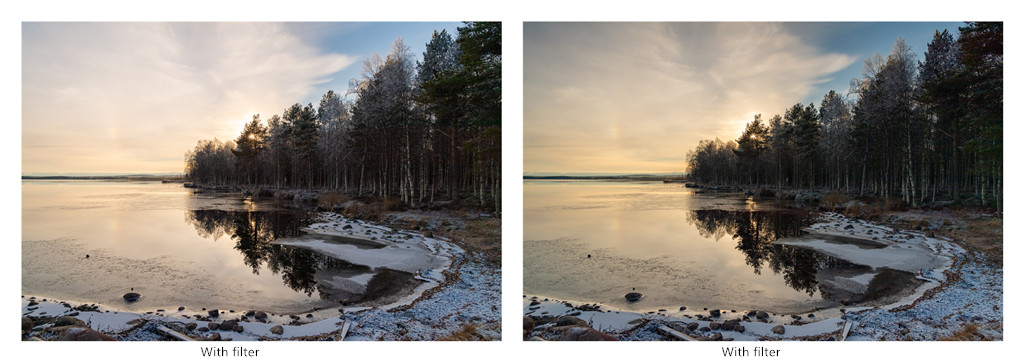
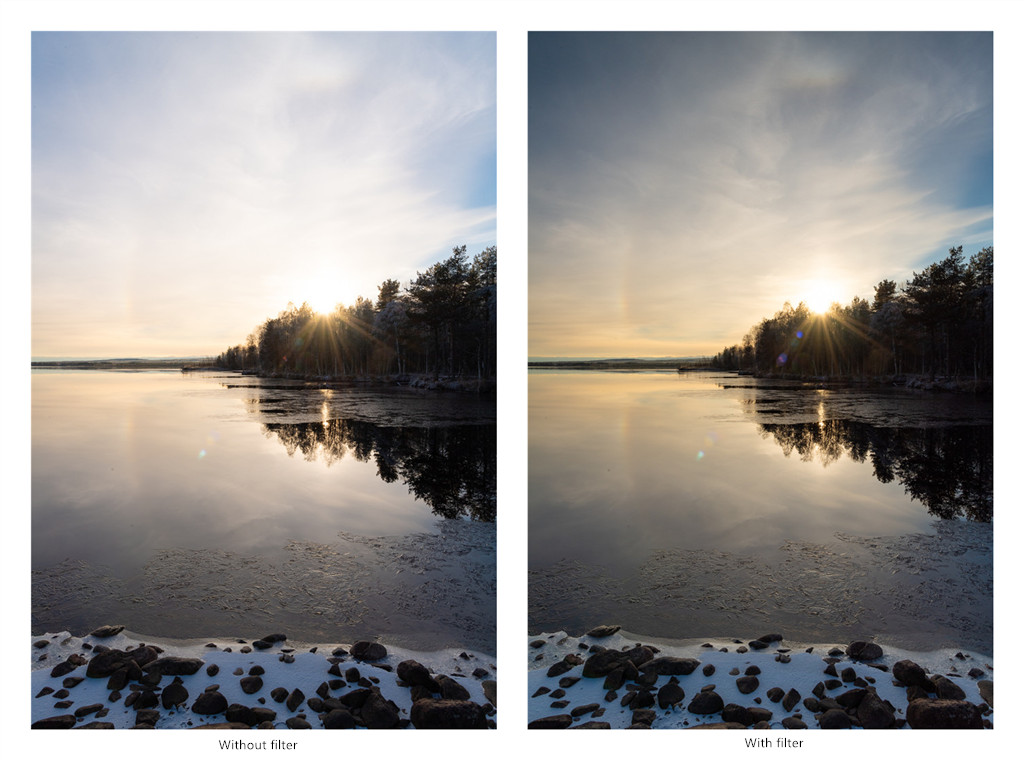
More examples using the same equipment setup:
1/60s | f/9 | ISO 100 | 24mm
1/500s | f/8 | ISO 100 | 24mm
1/80s | f/16 | ISO 100 | 24mm
Related news
- Using a Graduated ND Filter to Balance the Sky
- Tips of Choosing Suitable Filters
- M15 Filter Holder Haida
- Product Review: Haida Filters
- Haida Filters in Depth Review
- First Experience with Insert Filter